Friday, July 4, 2014

"Vegan" Power Protein Bars


My husband works on his feet for 11 hours a day and is finding that this new diet is a bit hard to get the calories he needs in the day to keep going. But, bless his heart! He’s still trying! So I searched the glorious world of pintrest to see what I could whip up that he could easily eat to get some extra calories and nutrients in, and found these: Chocolate Peanut Butter Breakfast Bars
And of course since I am incapable of perfectly following directions, I switched up a few things. They turned out AHHHmazing and my husband even said, “They taste like a Reese’s cup! YUM.”


"Vegan" Power Protein Bars


1½ cups rolled oats (use gluten-free if desired)
 2 tablespoons chia seeds
1/4 cup flax seed meal
1/4 cup sunflower seeds
1/4 cup raw hemp seeds
1/3 cup raw pumpkin seeds
1/2 cup raw cashews, roughly chopped
1/2 cup raw walnuts, roughly chopped
1/2 cup agave nectar, or honey, or maple syrup
1 cup nut butter of choice – I used half raw almond butter, half organic peanut butter
1/2 cup vegan, gf chocolate chips such as Enjoy Life Mini Chips (I roughly chopped these as well to extend more chocolately goodness to every inch of these bars… Also, since my current diet only requires 95% plant-based, whole-foods, I cheated on this and just used organic semi-sweet chocolate chips :) Whatever’s your preference

Directions:

1.  Line 9x9 pan with parchment or wax paper.
2. In a bowl large enough (I was lazy and just used my kitchenaid) add all ingredients and mix thoroughly.


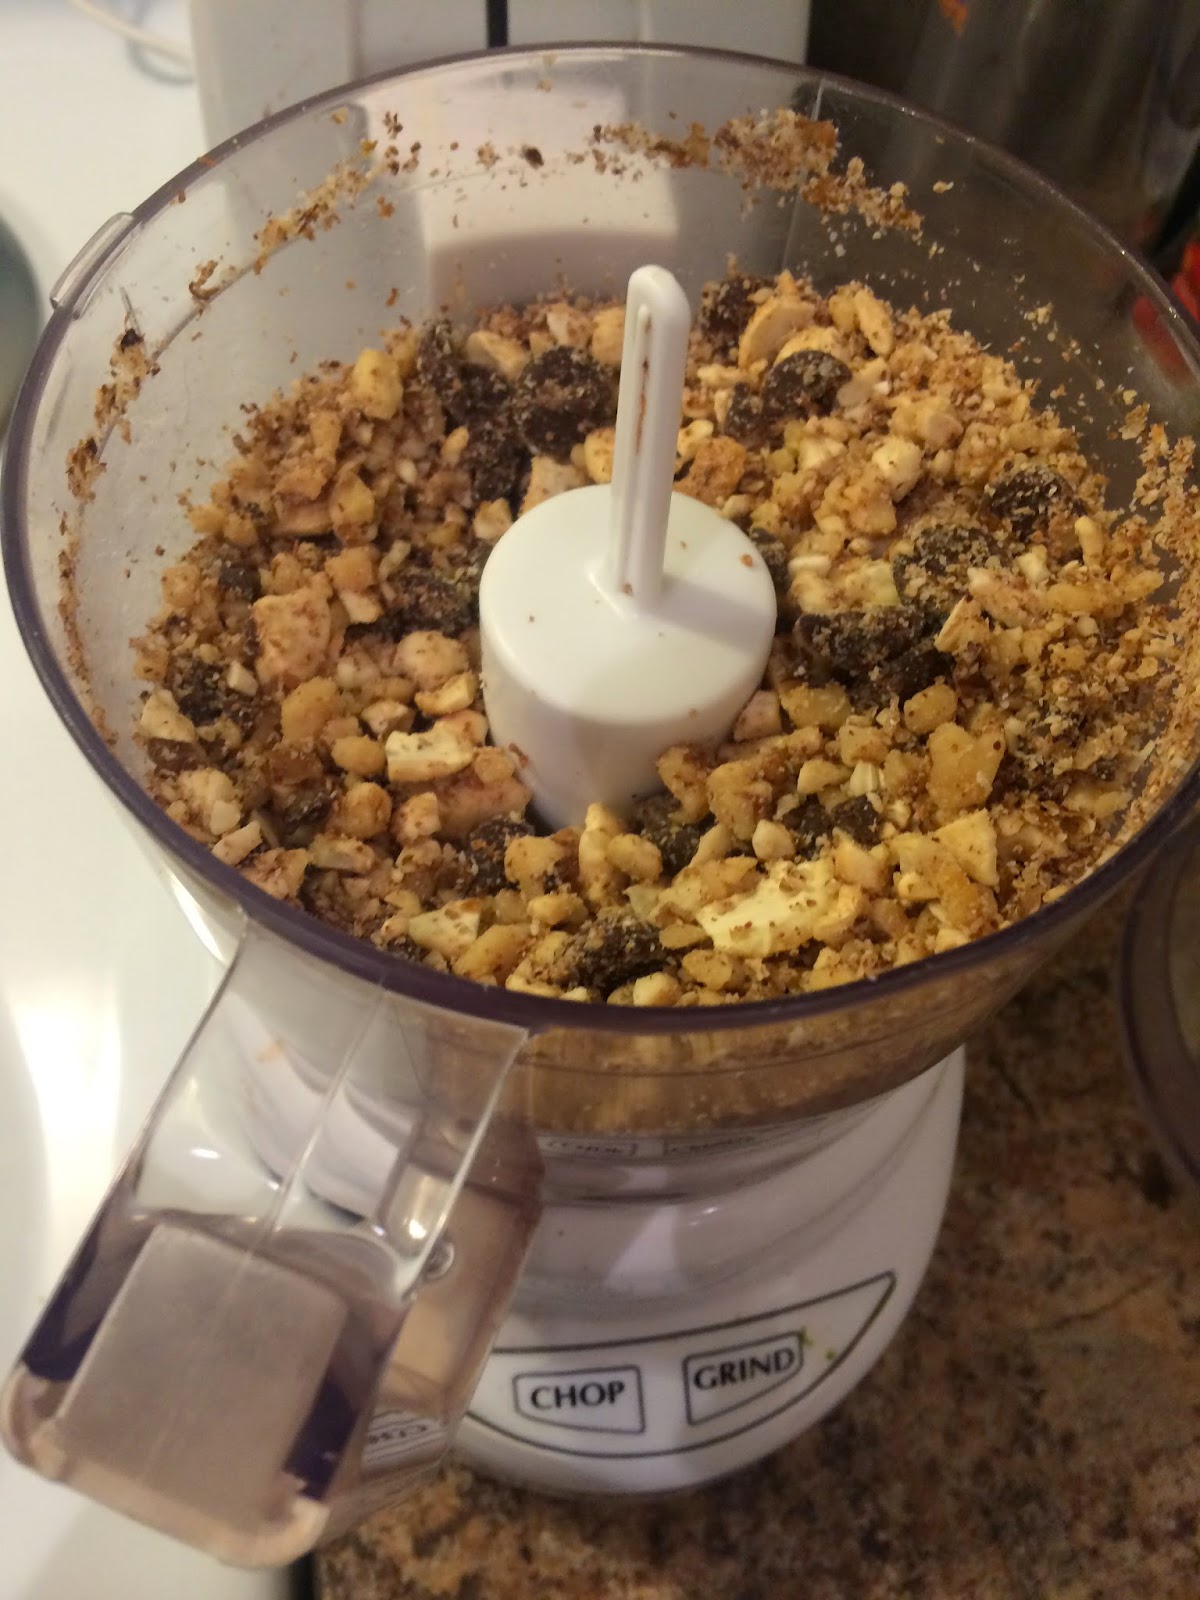
(This is actually my food processor, used to "roughly chop" the walnuts, cashews, and chocolate chips)

3. Spread mixture evenly in 9x9 pan and press down with fingers or I used the back of a 1-cup measuring cup to get a nice flat surface.


4.  Pop those babies in the freezer for a few hours!
5.  After nice and frozen, pull the bars out of the freezer and remove the whole 9x9 “bar” onto a cutting board.
6.  Cut into as many bars as you want, but I find the perfect size are 4bars’x’4bars, totaling 16 bars.


7.  To store, place cut bars in an airtight container, with parchment or wax paper separating layers. I’m sure you can store these in your fridge, but I love the crunch of them when they are frozen! Can be stored for up to a month in fridge, couple months in freezer.


And BOOM. There you go! Minimal effort, maximum delicious nutrition. And perfect to grab and go in the morning for busy husbands.

"Vegan" Power Protein Bars FOR THE WIN!

Friday, June 27, 2014

Clean Pumpkin Zucchini Oatmeal Pancakes

I am obviously the worst blogger out there... ya know, since it's been a whole year since my last post and all... But that's ok, I've had a few things going on ;)

So instead of a long explanation of why I haven't been on, I'm just going to dive back into blogging with a recipe I conjured up this morning. I've been craving some comfort food and I have three gallon freezer bags full of shredded zucchini and yellow squash from last summer's harvest that I've been needing to use up so I thought, why not combine? PANCAKES. Pancakes speak comfort to me!

sidebar: I just used my iphone for these pictures, so bear with me haha


Clean Pumpkin Zucchini Oatmeal Pancakes

  • 2 cups oat flour (if you don't have oat flour, just take oats and throw them in your blender until they reach a flour consistency)
  • 3 tablespoons unprocessed sugar
  • 2 teaspoons ground cinnamon
  • 1/4 teaspoon ground ginger
  • 1/8 teaspoon ground cloves
  • 1/8 teaspoon ground nutmeg
  • 1 tablespoon baking powder
  • 1 and 1/2 cups almond milk (or any other non-dairy milk you prefer)
  • 1/2 or 3/4 cup canned pumpkin
  • 1 small(ish) zucchini, shredded and extra moisture patted out with paper towels
  • 1/4 cup melted coconut oil (unrefined, cold-pressed, extra-virgin, organic is best)
  • 1 and 1/2 teaspoons vanilla extract
  • 1/4 cup water
Directions: 
1. Stir together oat flour, sugar, spices, and baking powder in a bowl. 
2. Add the remainder of the ingredients, except the water, and mix well. Add up to 1/4 cup water to get the consistency you like.
3. On medium to medium high heat, brush a pan (or I used a griddle) with coconut oil. With a 1/4-cup measurement, scoop the batter into pancakes. When you see bubbles appear on the surface of the pancake (approximately 2-3 minutes) flip it. Cook for another 30 seconds on the second side before removing from the pan. Repeat with the remainder of the batter.


(cooking their little hearts away)

Serve with maple syrup and coconut oil (or organic unsalted butter), or some of your favorite chia jam.

I like to freeze my leftovers, (on a cookie sheet lined with wax paper, then transferred to a freezer safe ziplock bag) for easy future breakfast with the kids, or for my husband to grab for lunch at work.

These are great because they totally follow with a clean eating diet, if you're interested in that. I've been doing the Green Smoothie Girl's clean eating diet, and I've been feeling so great and have SO much more energy, it's unreal! I've lost a few pounds as well, so that doesn't hurt anything! Pumpkin is a superfood, zucchini is great for you, and since we've used oat flour, as long as the spices and everything else you use is considered GF, then you've gotten rid of that gluten factor as well! Go you! Unless of course you don't care about that... then, whatever... ;) AND KIDS LOVE THEM, which makes me love them even more. And they make your house smell amazing, too.

(I understand this isn't the prettiest of pictures, but oh if you could smell what I smell!)

Happy Eatings!!

Tuesday, May 21, 2013

Super Duper Immune Booster! (bum bah da baaaahhhm!!!)


I’m beginning to believe I was even a little too ambitious saying that I would post twice a week, since you can see that obviously hasn’t happened yet… In my defense though, it’s been a very long and very crazy week. What have I been up to? Oh you know, cooking enough food to feed the masses. 200 people to be exact. I was hired to cater a wedding reception for a friend. Crepes bar. Mmmmm! I used over 10 dozen eggs, 1.5 gallons of milk, and approximately 8 pounds of sugar on these crepes alone. About 150 of each the savory and the sweet kind. My spatula and my pan were my only tools. Each crepe batch took an hour to whip up and to let rest, then another hour to crank out the actual crepes. Though, I did learn quite useful tips: savory crepes cook faster and look prettier than sweet crepes. My theory is that this is because of the sugar content in the sweet crepes The sugar caramelizes and makes the crepes have brown spots instead of a nice, even, beautiful shade of yellow like I expect them to have.

Also, I know I promised we were going to start on the 28 day Engine 2 Challenge… but this has yet to be done… It’s so hard! Seriously! My cravings for all things salt and crunchy are so incredibly strong… I need to find the strength to tell them to hush up and let me do my thing! 

My other problem is that I. Love. Food. So much. You know how people are all like, “Eat to live! Don’t live to eat!” Well, I think those people have OBVIOUSLY never had to struggle through prednisone. Those people have never graduated with a degree in delicious food. I am not one of those people.


Enough of my griping. Like I said, I just need to find the inner strength to tell prednisone to “Shut it,” and get on with it.

However, I am making baby steps in the right direction. I LOVE to give my morning a swift kick in the pants to get it moving. I do this by juicing. Now, I would love to tell you all of the benefits of juicing and how you can detox, energize, or boost your little white blood cells to fight off the evil germs of the day, but “Ain’t nobody gots time for that!!” Instead, I’m going to recommend that you watch “Fat, Sick, and Nearly Dead”. It pretty much converted me to the power of juicing. Here’s the website, summary, and trailer. You can also watch the whole documentary on Netflix if you have that! And let’s all be honest here… You are probably like me and don’t crave the healthy things… I don’t like the way that a lot of vegetables taste. Especially beets. Bleh. No thanks. But see, with juicing, you can pretty well mask the taste of beets with oranges, pineapples, apples, and other strong and sweet tastes! 


In fact, here is my first and favorite way to start off the day: We will call it the Super Duper Immune Booster. (ummm, if anyone comes up with a better name, let me know! Haha)


It’s so simple. I took two apples, about a cup of pineapple, ¼ of a beetroot, 2-3 carrots (except I didn’t put it in the juice in these pictures because I was out… I need to do some grocery shopping! But it’s usually in this juice…) one peeled orange. Also, I don’t usually put kiwi in this recipe, but in this case I did. They were starting to look old and wrinkly so I needed to use them up...


So, just chop up your fruits and veggies to be able to fit into the chute, then start juicing away!

*sigh*...Just look at those beautiful colors...

I also very much love the taste of bananas. But as most of you could guess, there are some things that just don’t juice! So here’s what I do. I just juice everything else first, then pour the juice into my little knock-off bullet blender and give it a whirl. Voila!


Once you have made your juice cocktail, you are more than welcome to add some other things to it. Two of my favorites are raw chia seeds or ground golden Flaxmeal. This way, you get those healthy omega 3’s into your morning!

(side bar: the great thing about chia seeds is that when you soak them, they turn into this tapioca-like thing... It's such a healthy way to make "pudding"! But we will save that for another blog entry)

If you don’t have a juicer, I would definitely recommend investing in one. I know they are expensive, but the health benefits are awesome. You get to squeeeeeze all of those super nutrients out of your fruits and veggies and “eat” a plateful of life sustaining nutrients in just a couple gulps! Or, if you are like me and don’t like beets, this is your way of still getting all of the wonderful things beets offer, but not have to suffer through the taste! Also, I know another argument is that it’s wasteful. Here’s my solution: Get a chicken! Or a garden! Start composting! The scraps and pulp that come off you’re your juicer will give your garden some yummy nutrients. We have a chicken, and she goes crazy when we feed her the scraps. She just loves them! If you get a good enough juicer you will have very little, very dry scraps. My brother bought his new one and it’s very much like that. It also makes a pulpier product, which I love. I’m the kind of gal who buys OJ with extra pulp. Also, his gets the maximum nutrients and juice out of the things you put through it. It’s pretty awesome, I’m not going to lie. The juicer I have my sights set on is only about a couple grand… Pocket change… So yeah, unless I hit some sweepstakes, or the lottery, it’s probably never going to happen!  But that’s ok.

I just bought a juicing recipe book (and by bought I mean downloaded for free off Amazon…) so I’ll probably be doing the recipes on there for a while until my fridge clears out of all the things NOT allowed on this 28 day diet. Then we will re-group and get this started!!  There are only like… 50…. recipes to get through… no biggie… 

Friday, May 10, 2013

A Move Towards Healthy

**Word of warning: It was 1am when I wrote this, please excuse grammatical and spelling mistakes!**

Well, it's definitely been a while since I've been on here! I apologize! It was strange seeing that people still visited! So what have I been up to in the meantime? Well foodie friends, I am proud to announce that after many long hours and hard work, I am now an officially graduated baking and pastry chef!! 

See? I have proof.


But you know what the sad thing is? I'm trying to get healthier. This part is not sad. Healthy is ALWAYS a good thing. The sad part is that I just graduated with this degree in unhealthiness! Cupcakes, macarons, eclairs, croissants, and copious amounts of butter are not in my health plan...

See, in August 2010 I received a stem cell transplant, but soon after a lovely thing called Graft-VS-Host (GVHD) disease showed up. This is where my cells recognize foreign cells in my body (the transplant) and attack them, causing not-so-awesome side effects for me. It could show up literally anywhere in my body and it first showed in my skin and has stuck around for the past 2+ years. The solution to this? A lovely steroid called Prednisone. Well, if any of you are familiar with this drug, it really isn't so lovely. Long term consumption of it puts you at high risk for arthritis, osteoporosis, diabetes, muscles weakening, etc... So far I've escaped most of those, but have not escaped the lesser side effects, and thankfully the mostly reversible ones. Skin thinning, vein thinning (causing awful looking bruises with anything as soft as a feather...), super increased appetite (=weight gain!), mood swings, insomnia, and the list goes on. 

Now, imagine this increased appetite from the steroid...and going to culinary/baking school. Surrounded by the sweet aromas of creme brulees, pata choux, sizzling steaks next door in the Meat Fabrication class (a fancy name for butchering), and my personal favorite: ganache. Not many things smell better to me than butter and chocolate being melted by scalded milk... 

Well dear foodie friend, before I was put on prednisone, I weighed 145lbs. A very healthy weight for my 5ft 5in frame. I had ran and finished a half marathon in a little less than 4 hours! By the time I finished my 18 months at culinary school (with the addition of prednisone) I weighed in at a whopping 217lbs and got winded walking to the mailbox.

Christmas rolled around, and our annual trip to Florida to visit my grandma (dad's mom) came with it. My brother, Brandon, showed up in all his skinniness! I know he'd been increasing his activities and healthy way of living out in Seattle, but woah, he looked awesome! Super healthy! He was back down to his high school fitness, if not better! I wanted that for myself! So I started grilling him on diet tips and what he'd been doing! I knew he'd been doing the "kinda" vegan diet. "Kinda" because he would allow himself a cheat day here and there. (kind of like this TED talk by Graham Hill: Why I'm a Weekday Vegetarian) He also opened my mind to the world of juicing. I was intrigued. I started researching into it. I watched every documentary Netflix had on food: "Fat, Sick, and Nearly Dead", "Forks over Knives", "Food Matters", "Hungry for Change", "Vegucated", all 14 of the TED talks they had about food in their "Chew on This" category... etc etc. The more I researched, the more it made sense to me. 

So without further adieu, I am proud to announce, after about 6 months of research, I'm finally making the switch over to the plant based, whole foods diet, starting with the 28-day Engine 2 Diet Challenge! I have also talked my husband into doing this with me! All of my good cooking has made him gain a few pounds as well... *ahem* And not to mention I kind of made him promise that he would always stay 5lbs heavier than me... yeaaahhhhh... Looking back, I blame prednisone for making me say that... 

**I've already been working on getting healthier since the beginning of 2013, and I'm so happy to tell you i've dropped down to under 200! Not by much though... This morning I weighed in at 199.8 haha!**

So, I'm ready and pumped about letting you all watch our journey through 28 days of plant based whole foods! We are starting this crazy excitement on Monday, May 13th, 2013! (We still get to cheat on Mother's Day, right??) Anyone want to join in? My goal is to post our progress as much as possible! Right now the overly ambitious voice in my head says, "Yah!! Post everyday!!", but the more rational side takes over and says, "Yah, that's not going to happen..." More likely it will be a minimum of two posts a week.

I so hope you will take this journey with me, and more importantly, help to keep me on track! I've got about 60lbs of prednisone to shed... Here we go!! And to track progress, we will start with a couple flattering "before" shots in my frumpy clothes:


(because frumpily clothed "before" shots always make the "after" shots look so much better ;))

And here is the body I want back:


!!Wish me luck!!


Saturday, May 26, 2012

Broccoli & Cauliflower Pesto Pizza


I saw it all over Pintrest. Cauliflower pizza crust. Seriously? Could this really be any good? So I had to try it.

But of course, I don't really ever follow recipes. Ever.

I bought some cauliflower. And it sat in my fridge for a while. Cauliflower crust? Really? But then I finally decided to give it a go.

This is the blog I adapted my recipe from: Eat. Drink. Smile.

So, as I was chopping up the cauliflower and thought, "Hey! I have broccoli too! Cauliflower... Broccoli... same family... Why not?"

So I chopped up some of that as well and threw it in there.

I saw the spices list for this recipe, and I like a lot more flavor than just garlic, salt, and oregano... so I searched my fridge, and found some pesto. Yahtzee! So I threw in a spoonful of that as well. Mmmm, I love the smell of pesto!


We are proud new owners (one week today!) of three beautiful and hilarious chickens. They have been very good egg layers and we are accumulating quite the collection in our fridge. So, our crust has delicious and nutritious farm fresh eggs in it!


So my recipe is as follows:

1/2 cup cooked, riced cauliflower
1/2 cup cooked, riced broccoli
1 cup shredded cheese of your choice (I used colby jack)
1 egg, beaten
1 tbsp pesto
1 clove crushed fresh garlic
olive oil (optional)
salt
pepper

pizza toppings of your choice

1. Cut off some florets of cauliflower and broccoli and run them through a food processor (If you don't have a food processor, I've been told a cheese grater will work, but I definitely don't have the patience for that! haha!)


2. Place the processed cauliflower and broccoli in a microwave safe bowl and microwave, uncovered, for 8-ish minutes. Don't add water because it will make the mixture too soggy and wet.


3. Once cooked, add the cheese, pesto, garlic, salt, pepper, beaten egg, and optional drizzle of oil and combine until pasty.


4. Generously oil you pizza pan (I found this out the hard way! Mine was soooo stuck to the foil I lined my pan with... pictures later on...) and spread the yummy mixture evenly onto the pan with a spatula or your hands.


5. Cook at 450F for about 15 minutes. Keep and eye on it, I burnt mine a little.


6. Remove from oven, add desired toppings 


7. Cook for another 3-5 minutes, mostly until cheese is melted.


As I mentioned before, this first attempt got horribly stuck to the foil. I promise I sprayed it with my oil spritzer! Next time I make this recipe, I'm going to either oil it MUCH better, or maybe sprinkle some cornmeal on the pan to keep it from sticking. If you try this, please let me know how it works!


We mostly got toppings on our plate, but still got the crust. It was so yummy! I really like cheese and broccoli/cauliflower anyways, so I knew I would like it. Not to mention, my husband added ranch dressing and chicken. Two other favorites. Awesome.


But it looked a little reminiscent of something a lunch lady would plop on your cafeteria tray.

...all right, maybe not THAT bad, but it definitely didn't look like pizza!

But still delicious. My hubby even went back for a second helping. Win!

Let me know what you all think of the recipe!


Thursday, April 5, 2012

Roasted Veggie Lasagna


In my nutrition class on thursdays, we were given a recipe modification project. We had to take a recipe and change at least three things about it to make it better and healthier. I chose a creamy chicken lasagna and made it vegetarian!

Here is the original recipe if you are interested: Creamy White Chicken and Artichoke Lasagna

And here is my healthier, vegetarian version!

Ingredients:

1 medium head of garlic
6-7 fresh Roma tomatoes
1/2 of a large white onion, chopped
8 ounces fresh spinach
2 cups plain greek yogurt
1 block silken tofu
2 sprigs of fresh basil (approximately 21 grams
2 large zucchini, sliced lengthwise
Parmesan and/or feta cheese (for sprinkling on top... could use goat cheese too! I'm a fan!)


Directions:


1.     Roast garlic: Set oven to 350°F. Cut one end of the head of garlic off. Spritz garlic with extra-virgin olive oil (EVOO) spray. Wrap in aluminum foil and roast in oven for one hour. Remove and let cool. (when it comes time to add it to the sauce, it should be cool enough to just squeeze the roasted garlic from the skin... Easy Peezy!)


2.     Cut tomatoes into quarters, spread out on sheet pan, cut-side up. Spritz with EVOO spray. Roast in oven for 45 minutes (can do this the same time as the garlic.)


3.     Chop and sauté onions: in a medium sized skillet, spray EVOO on pan and add chopped onions. Sautee onions until tender. Set aside.


4.     Place small amount of water in a large saucepan. Add spinach. Place a lid on the saucepan and wilt the spinach. Once wilted, set aside.


5.     In a food processor, add block of silken tofu, 2 cups of Greek yogurt, basil, onions, and garlic. Process until smooth and creamy. Mix in wilted spinach. Set aside.


6.     With a knife or a mandolin, slice 2 zucchini, length wise, into strips.


(yes, I know I took a picture of three... But you only need two :))


7.     In a 9x13 inch glass baking dish, place a layer of the creamy yogurt mixture. 


Sprinkle a layer of the roasted tomatoes on top of the creamy mixture. 


                                                    Add a layer of the sliced zucchini.


Repeat.


8.     Add the last little bit of creamy mixture to the last layer of zucchini. Sprinkle with tomatoes and chopped fresh basil. 


Cover with aluminum foil and cook, covered, at 350°F for 45 minutes. 


Meanwhile, while the heavenly aromas started to eek from my oven and fill my beautiful home, I tackled these suckas!!:

Complete. Dish. Ownage. 


Please note how the sink shines with awesomeness.

*sigh*...I just love a clean kitchen :D

Well, it didn't take me the full 45 minutes that the lovely lasagna was cooking to finish the dishes, so I was a nerd and tackled some homework as well... Go me! 

Then the timer on my oven went off. Most annoying timer. Ever. It beeps three times in a row, waits less than 5 seconds, and feels the need to remind you with another beep.

...and every 5 seconds after that...

 Welp, back to my project!

Uncover the dish and sprinkle Parmesan cheese on top of the lasagna. 


Cook for an additional 15 minutes.

9.     Remove from oven and cool for about 15 minutes, cut, serve, and ENJOY!


Feast your eyes on this beauty. Oh man, and when it's cooking.... The basil and the garlic smell...

AMAZING.

The Greek yogurt adds so much protein, the tofu adds body to the dish, The spinach and tomatoes are superfoods that add anti-oxidants and loads of vitamins that you're beautiful body needs.

Although, I didn't add any salt to the recipe (I'm trying to cut back on my sodium intake.) I think it tastes fine without it, but you all will probably want to add some :)

I hope you enjoy this dish! Please let me know what you think about it!!

BTW, Here is the recipe all together, so it's easier to copy and paste and print if you want :D

Roasted Veggie Lasagna
Serves 12


Ingredients:
1 medium head of garlic
6-7 fresh Roma tomatoes
1/2 of a large white onion, chopped
8 ounces fresh spinach
2 cups plain greek yogurt
1 block silken tofu
2 sprigs of fresh basil (approximately 21 grams
2 large zucchini, sliced lengthwise
Parmesan and/or feta cheese (for sprinkling on top)
Salt and Pepper to taste


Directions:

1.     Roast garlic: Set oven to 350°F. Cut one end of the head of garlic off. Spritz garlic with extra-virgin olive oil (EVOO) spray. Wrap in aluminum foil and roast in oven for one hour. Remove and let cool.
2.     Cut tomatoes into quarters, spread out on sheet pan, cut-side up. Spritz with EVOO spray. Roast in oven for 45 minutes (can do this the same time as the garlic.)
3.     Chop and sauté onions: in a medium sized skillet, spray EVOO on pan and add chopped onions. Sautee onions until tender. Set aside.
4.     Place small amount of water in a large saucepan. Add spinach. Place a lid on the saucepan and wilt the spinach. Set aside.
5.     In a food processor, add block of silken tofu, 2 cups of Greek yogurt, basil, onions, and garlic. Process until smooth and creamy. Mix in wilted spinach. Set aside.
6.     With a knife or a mandolin, slice 2 zucchini, length wise, into strips.
7.     In a 9x13 inch glass baking dish, place a layer of the creamy yogurt mixture. Sprinkle a layer of the roasted tomatoes on top of the creamy mixture. Add a layer of the sliced zucchini. Repeat.
8.     Add the last little bit of creamy mixture to the last layer of zucchini. Sprinkle with tomatoes and chopped fresh basil. Cover with aluminum foil and cook, covered, at 350°F for 45 minutes. Uncover and sprinkle Parmesan cheese on top of the lasagna. Cook for an additional 15 minutes.
9.     Remove, cool for about 15 minutes, cut, serve, and ENJOY!